I’ve always designed a wedding in a similar way to designing a brand. A wedding monogram is like a logo for your wedding. It is the perfect way to brand all the details of your wedding day, from stationery, signs, gifts, and even your cake.
I always say to my couples it is the easiest way to add a luxury feel to your wedding. Having your couple monogram and all of your on the day stationery adds that higher level of detail that high end weddings have.
In this blog post, I am going to break down what a monogram is, how to create your own for free, and some fun and unique ideas to include your logo throughout your wedding.

Wedding monograms
A wedding monogram, often formed from the couple’s initials, is a symbol that signifies their unity and forms a key element in wedding branding.
It personalizes various wedding aspects such as décor, invitations, and favors. Its integration across different elements of the wedding, from stationery to venue decorations, not only enhances the event’s aesthetic but also brings a consistent and unified theme. The monogram’s versatility allows it to adapt to any wedding style, be it classic or modern, ensuring every detail contributes to a cohesive and elegant celebration that mirrors the couple’s personality.
What are wedding monograms used for?
Wedding monograms are used for a variety of purposes in weddings, serving both aesthetic and symbolic roles:
- Wedding Stationery: They often appear on save-the-date cards, invitations, and thank-you notes, adding a personalized and elegant touch.
- Wedding Décor: Monograms are used in decorating the venue, including signage, table settings, and backdrops, to create a cohesive and branded look.
- Personalized Accessories: They can be featured on items like ring boxes, ceremony programs, and even on the wedding cake, enhancing the event’s personalization.
- Gifts and Favors: Monograms are used on wedding favors and gifts, such as welcome tote bags for guests or custom cufflinks for groomsmen, making them more special and memorable.
- Bridal and Groom Attire: They can be embroidered on bridal accessories, such as the veil or the groom’s shoes, adding a unique and intimate touch.
- Wedding Keepsakes: Monograms are also used in creating keepsakes like photo albums or guest books, offering a lasting symbol of the couple’s union.
Designing your own monogram or wedding logo
Choosing the Right Initials
The most common approach is to use the couple’s first initials, sometimes alongside the shared last name initial. Consider the visual symmetry and how the letters interact with each other. For example, if both initials are vertically symmetrical (like ‘M’ or ‘W’), they may pair well together. Alternatively, choosing just the shared last name initial can create a unified symbol of your new partnership.
Selecting the Font and Colors
The font and colors of your monogram should align with the overall style and theme of your wedding. For a classic and timeless look, opt for elegant script fonts. For a more modern wedding, a clean, sans-serif font can work well. The colors should complement your wedding color scheme. It’s often best to stick to one or two colors to maintain simplicity and elegance.
Balance Between Simplicity and Elegance
A well-designed monogram strikes a balance between being simple enough to be easily recognizable and elegant enough to add a touch of sophistication to your wedding elements. Avoid overcomplicating the design with too many colors or overly ornate fonts, which can detract from its readability and impact.
Incorporating Wedding Themes or Motifs
If your wedding has a specific theme or motif, such as floral, nautical, or rustic, consider subtly incorporating elements of this into your monogram design. This could be as simple as a small floral accent for a garden-themed wedding or anchor detailing for a nautical theme. The key is to keep these additions minimal so that the initials remain the focal point of the design.
Remember, your wedding monogram should be a reflection of your personal style and the tone of your wedding. It’s a symbol that will not only be a part of your wedding day but can also become a lasting representation of your union.
DIY Guide Using My Free Monogram Wedding Template

Select a Template
The easiest way to create your own wedding monogram or logo is to start with a template. You can use my free wedding monogram template. If it is not to your style though I have lots for sale in my shop or check out other template options online.
If you want to completely start from scratch set up a board with your wedding colors and any fonts and elements from your wedding stationery if you already have this. Follow the tips above and just remember less is usually better!

Customize Initials
Click on the text box containing the initials and type in your initials. You will probably have to ungroup the monograms and move the initial around. This is the time to consider your initials and what will work best for you as a couple.
I do prefer first initials and then you can add your new second name, if changing. But for some people, this just does not work. You can do the one initial and have your names written. If you struggle you can get in touch and I am happy to help. Or you might be best getting a custom monogram made.


Adjust Colors to suit your wedding color palette
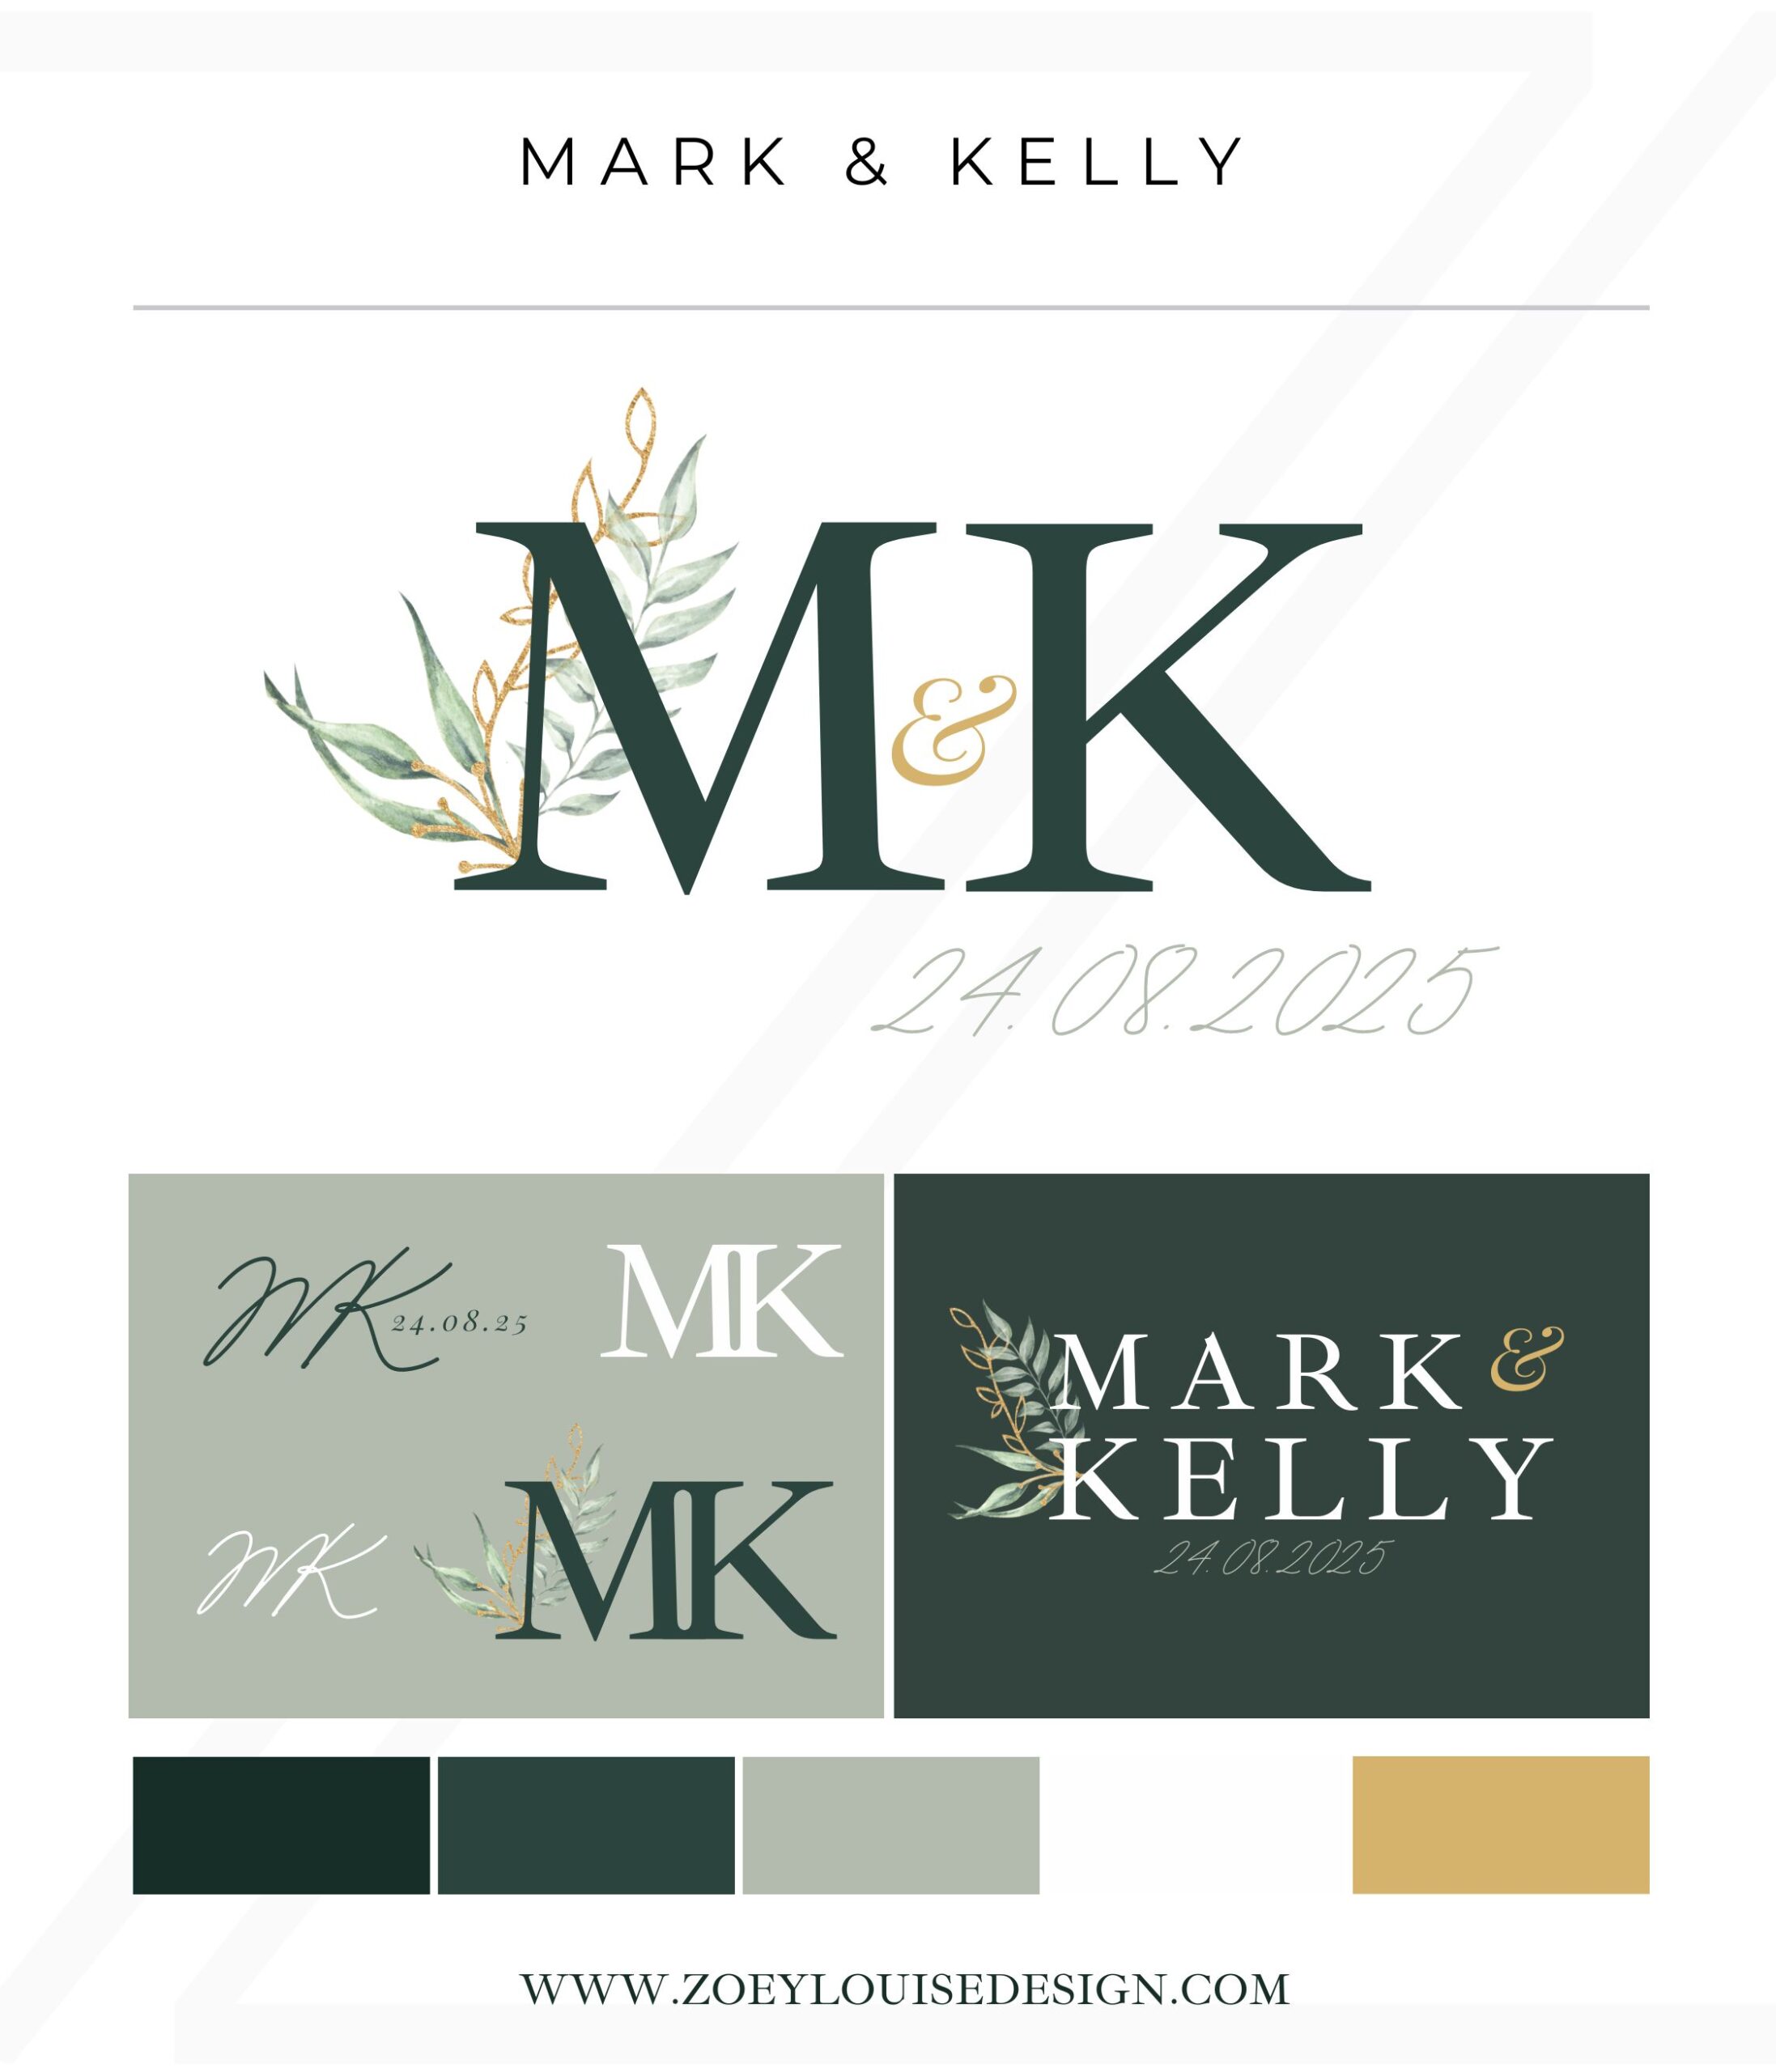
I include a wedding brand board for the first page to help you change the colors easily. If you select the color and change and then select CHANGE ALL COLORS this will change all the colors throughout the design.
You can see in the images above the difference that changing the colors can make. I also edited the greenery to make it black and white. It gives a modern boho feel now.

Add Decorative Elements
If your template includes elements like leaves or flourishes, position them around your initials as shown in the examples. You can usually click and drag these elements to place them.
This free template includes a gold and green leaf. You can swap this out easily with one of Canva’s elements or if you have your own. You can also edit this image, you can see above how it looks with the noir filter applied.

Include Additional Text
For additional details like the wedding date, click on the existing text in the template and replace it with your own date. Adjust the font size, color, and placement to harmonize with the overall design.
You might want to swap the date for your second name or remove it completely. Duplicate the page and have a play and see what you like best.

Preview and Adjust
Review your monogram. Make sure everything is aligned, and the text is legible. Refer to the provided images to ensure your design elements are balanced and aesthetically pleasing.

Save and Download
Once you’re satisfied with the design, save your work. Download the final version of your monogram in the desired format (PNG, JPG, PDF, etc.).
If you have a paid Canva account you have more options like saving as an SVG, this is good for sending you any graphic designers or if you are making your own wedding signs.
When downloading always size up and highest quality. If printing this is really important. If you have a free Canva account you may need to use another program to upgrade your image to 300dpi.
More blogs you will love!
- Emerald Green wedding color ideas for a stylish wedding

- Bridal Shower Schedule – Order of Events and Free Itinerary Template

- Mastering Your Bridal Shower Budget: A Complete Guide and Budgeting Tips

- I Spy Wedding Game Free Template and tips to creating your own

- Wedding Monogram, Logos for your Wedding Stationery – Free Template

- Emerald Green Bridesmaid Dress Ideas

Seating chart time! This wedding task can cause a huge amount of stress. It is definitely the main one my couples complain about or struggle with.
I get it! It can be hard when there are family dynamics to think about. You also only have a set amount of chairs for each table so seating everyone together who wants to can become difficult.
So how do you create a seating plan for your wedding stress free?
First pour a drink, only kind of joking. Arrange a night to do it with food and wine.
Remember you can never please everyone so don’t try, it will cause more stress. It is only for the meal and people can move after so it really isn’t a huge deal.
Top Tip – Start early, you can always move around as the guest list changes. Especially if using a digital table planner.
How to create a wedding seating chart
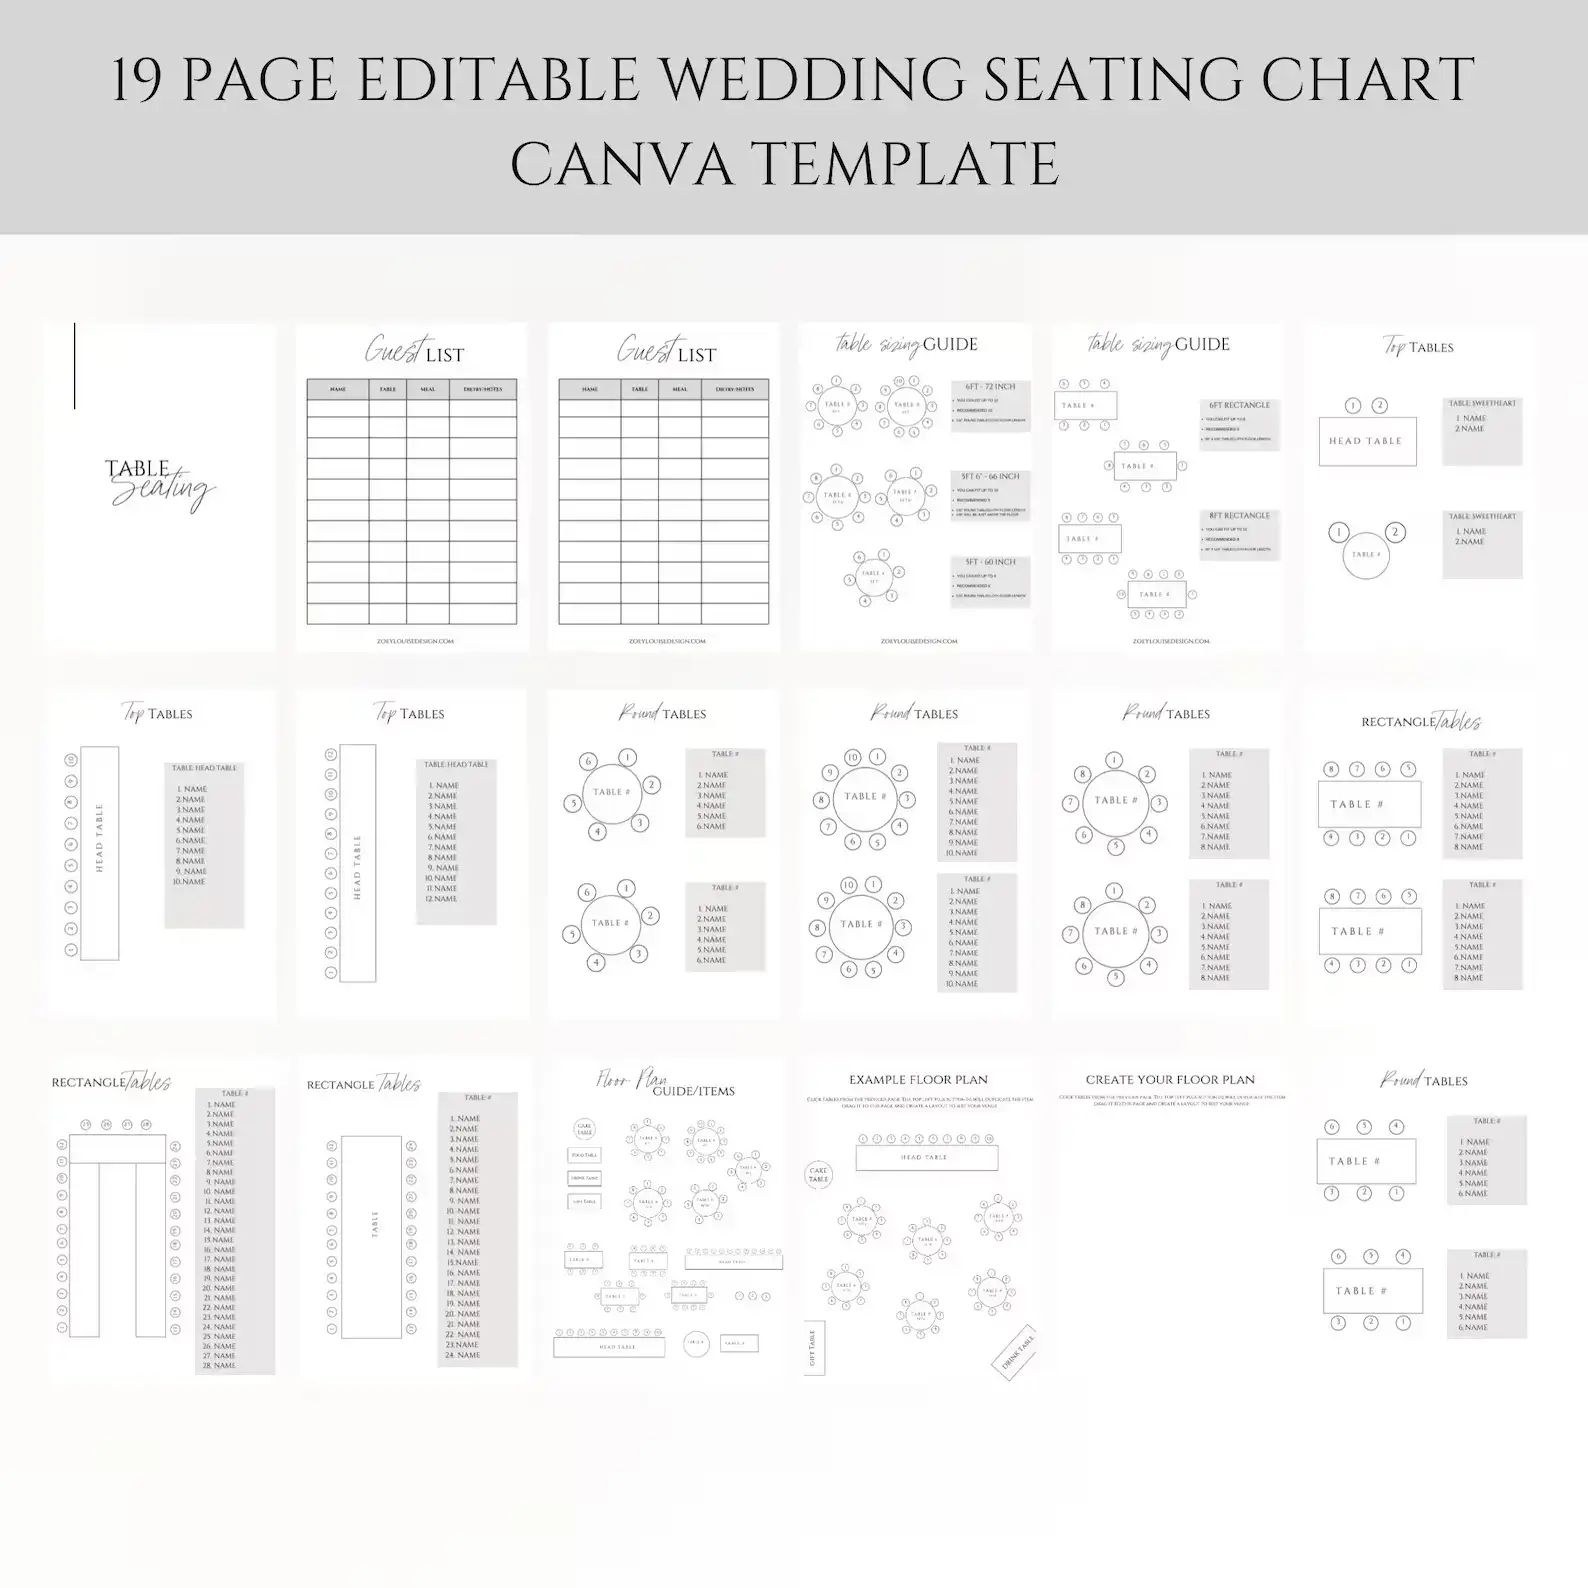
I am biased but I really do believe using my template will help take a lot of the stress out of the table seating plan. If not mine then create your own or find another that suits you.

Step 1: Prepare Your Final Guest List
Before diving into the seating chart, it’s essential to have your final guest list. This list should include all invited guests, including plus-ones. Having this list finalized early in your planning process is crucial as it forms the foundation of your seating arrangements.
Creating a guest list can be a delicate task. Ensure you have open communication with your partner and consider any budget constraints. Head to my guest list guide if you are still at this stage.
Once you have your list, organize it by grouping guests into categories like family, close friends, distant relatives, and colleagues.

Step 2: Choose Your Tables
Once you have your guest list, you’ll need to decide on the number of tables you’ll have at your reception. This decision depends on your venue’s layout and the number of guests you’re inviting.
You will also need to decide on the style of the tables. Will you have round tables or rectangles? Your venue will play a big part in this decision and also the feel you want to create. If you can’t decide head to my blog post on round tables vs rectangle.
It’s advisable not to overcrowd your tables. While your venue might suggest a certain number of guests per table, consider allowing more space for each person to ensure comfort. So many venues do this and I am always having to jump in and speak to them for the couple. Stand your ground if your venue pushes back.

Step 3: Create a Floor Plan with Tables
Design a floor plan that outlines the placement of each table at your wedding reception. Start by considering where the top table, where you and your partner will sit, will be located. Then, work your way back from there.
To create an effective floor plan, take into account the layout and dimensions of your venue. Ensure that there is enough space for pathways, servers, and guests to move around comfortably. This plan will serve as your visual guide when arranging the seating.
If you’re using my wedding seating chart template then you want to copy and paste the tables you will using at your wedding from the ones provided. Move them around to decide the layout of your table.
If you can get one, usually the venue will provide it if you ask, add the floor plan of your reception room.
Step 4 Start with the top table
You need to decide what type of top table you will have first and who will be sitting there. If a sweetheart table, will you have the rest of the wedding party sit together?
If a traditional top table then you can start there and then work out. Who else from the wedding party is there? They will sit on the next closest tables traditionally. Will you sit all the groomsmen and bridesmaid together?
What about plus ones of the wedding party, especially those who are sat on the top table. Where will you place them? These questions and placing the top table and wedding party first can start to develop your seating chart for you.
Step 5: Consider Special Circumstances
Be mindful of any special circumstances among your guests. Consider the needs of elderly or disabled individuals and make accommodations as necessary to ensure their comfort and accessibility.
When planning for guests with special needs, consult with the venue to ensure they have the required facilities and accessibility features. It’s essential to be proactive and address any concerns beforehand to provide a seamless experience.
Any strong allergies, I would suggest not serving the food item but if you did consider where they are sat.
Step 6: Think About the Kids
If you have children attending your wedding, consider setting up a separate kids’ table or an area with age-appropriate entertainment and supervision. This will keep the little ones engaged and allow their parents to enjoy the celebration. You have to know your wedding guest here though. It works perfectly for some but for others, it is a kid screaming disaster!
Kids can be unpredictable, so having a designated area for them can be a game-changer. Hire a babysitter or a responsible family member to watch over them, and prepare some fun activities to keep them entertained throughout the event.
Step 7: Decide on Mixing or Seating Friends and Family Together
One of the final considerations is whether you want to mix your guests or seat friends and family together. Mixing guests can encourage interaction and create a lively atmosphere, but ensure that everyone has at least one or two familiar faces nearby.
Mixing guests is a great way to unite your families, but it’s important to strike a balance. Avoid isolating anyone by ensuring that they have someone they know nearby. You can use a seating chart tool to visualize different arrangements and find the perfect balance.
More blogs you will love!
- Emerald Green wedding color ideas for a stylish wedding

- Bridal Shower Schedule – Order of Events and Free Itinerary Template

- Mastering Your Bridal Shower Budget: A Complete Guide and Budgeting Tips

- I Spy Wedding Game Free Template and tips to creating your own

- Wedding Monogram, Logos for your Wedding Stationery – Free Template

- Emerald Green Bridesmaid Dress Ideas

